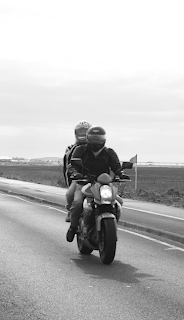
Monday 28 December 2009

Capturing ambient light and using slow slow shutter speeds

Nightclub Photography - What an ace night! met some amazing people and got to photograph and meet one of the top world class djs of the moment! cant wait to do some more events and practice! nightclub photography is by far the hardest thing ive done so far but when the results come out right theres a great sense of satisfaction!

ISO 200
F4.5
1/4s
I love the light trails on this image! the turn tables are very clear and the pioneer logo looks great.


ISO 800
F5.6
1.0s
I found it really difficult to freeze the motion of the DJ without the strobe flashing away! but i found that this was a really successful photograph as he is very clear and sharp and the colours look really effective.


ISO- 800
F13
4.0s
High Iso for low light conditions. No flash to pick up loats of colour. a slow shutter speed allowed enough light to enter the lens and see the people a good amount of movemnet has been picked up. not sure why my aperture was set to f13 but i wonder if it would have come out as well with a lower aperture setting?


ISO 800
F5.6
0.6s
I used a very slow shutter speed to pick up the movement of his legs but used the 2nd curtain flash to freeze the motion as to not blur the face. Think this came out pretty well.


Tuesday 8 December 2009

Depth Of Field


Depth of field is the range of distance within the subject that is acceptably sharp. The depth of field varies depending on camera type, aperture and focusing distance, although print size and viewing distance can influence our perception of it.


term called the "circle of confusion" is used to define how much a point needs to be blurred in order to be perceived as unsharp. When the circle of confusion becomes perceptible to our eyes, this region is said to be outside the depth of field and thus no longer "acceptably sharp." The circle of confusion above has been exaggerated for clarity; in reality this would be only a tiny fraction of the camera sensor's area.


I then created my own photographs using this technique

Monday 7 December 2009

Commercial Photograph - Objects brief


Iso - 200 F8.0 1/30s
The photograph is very under exposed

Iso - 200 F8.0 1/30s
This photograph is better but still under exposed. I needed to use a top light to light up the lid.


Iso - 200 F8.0 1/30s

Iso - 200 F8.0 1/15s
Iso - 200 F11 1/8s
Iso - 200 F11 1/125s

Glass Bottle - Lighting Effects - Systems and Processes

Umberella -
ISO 200
F8.0
Shutter Speed - 1/60s


Honey Comb -
ISO 200
F8.0
Shutter Speed - 1/60s


Soft Box -
ISO 200
F8.0
Shutter Speed - 1/125s (had to increase the shutter speed at it was over exposed)

Beauty Dish


Bottom Light (Soft Box)


Bottom Light (Soft Box) with Beauty Dish (No Flash)

Reflections

Sunny 16 Rule

If You don't have a light meter

The sunny 16 Rule
Set Shutter Speed to the ISO equivalent
ISO 125 - 1/125 shutter speed

Set the aperture depending on the weather

F5.6 Miserable day
F8.0 Cloudy
F11 Cloudy but Sunny
F16 Bright Sun(Beach, Snow)

Darkroom Workshop Week 2 - Processing Roll Film

We were using Panchromatic Film which was sensitive to all light colours.
between the group we used two types of film:
Ill ford FP4 ISO 125
HP5 ISO 400
The roll film has different exposures ranging from 8-16 but this depends on the camera type.

With 6x9 format you will get 8 exposures
With 6x6 you will get 12
With 6x4.5 you will get 16

We are using 120 roll film (you can also get 220)

In the darkroom we took off the film backing paper.
We loaded the non masking tape side onto a spiral.

We were using a twin lens reflex camera (TLR)
(A single lens reflex is what we would normally see (SLR) like our DSLR's)

The top lens is the viewing lens which the light hits the mirror and is projected into the viewfinder.
The bottom lens is the taking lens where the light goes straight from the lens to toe film.

The benefits of this type of camera is that the lens never goes dark so if somebody blinked you would have seen the shot at the exact time it was taken.
Also the photographer looks down into the top of the camera whilst taking the shot.. which means that the person isn't aware they are being photographed which can be a large benefit.

The negatives are that what you see in the viewing lens is slightly different to what the camera captures. they are best for taking mid to long distance photographs and not close ups.

like the camera we used in the first session the aperture and shutter speed are on the lens.
1/300 is the minimum right down to BULB
The aperture ranges from F3.5- F22

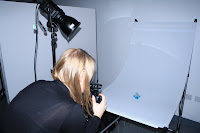
For this exersise we used 45º/45º lighting (continuous light)

We used an ambient light meter

There are two types of light we can test
Incident light - direct to subject
Reflective light - off the subject
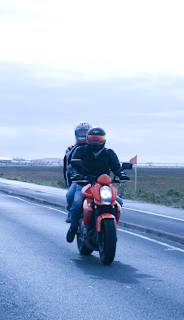
Our readings were

1/45 F8.0 - indecent
1/15 F8.0 - Reflective reading was 2 stops underexposed

Exposure Latitude for Black ans White film. 2 stops over exposed to 1 1/2 stops under exposed.
We go to 1/8s to be within latitude

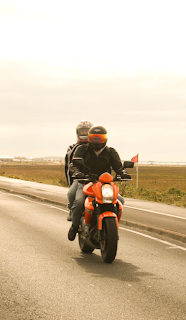
Exposure Bracketing - Taking a series of shots of different exposures to graduate a correct one.
the shutter speed is changed for bracketing as there will be no subject movement due to tripod

1/2 s F8.0 -2
1/4 s F8.0 -1
1/8 s F8.0 0
1/15 s F8.0 +1
1/30 s F8.0 +2

When Developing
FP4
Must be 500 ml of each liquid and they must be at 20°

Developer Liquid - 8 mins Agitate for 1 min constant then every 30 seconds for 5 seconds
Stop Bath - 1 min Agitate for 1 min constant
Fixer - 5 mins Agitate for 1 min constant
Water Bath - Leave for a while then hang up to dry

Reserch

In lessons we were given lots of famous and inspirational photographers and I decided to do some more research into them.

Ansel Adams
He was born in 1902 in San Francisco. His work includes the extensive study of small details and natural forms. He liked to photograph things that man had not touched.


Bernice Abbott
She spent most of her productive life in Photography in New York. Her Work includes portraiture and modernist experimentation. She was also an educator, author and historian. She photographed New York cityscapes.


Minor White
He was an American Photographer, educator, poet and critic. He was a textural photographer and many photographs include things like trees, bushes, cracks in the road or a rusted up pipe or car. He co founded the magazine "Aperture" with Ansel Adams.


Diane Arbus
She started taking her own photos in the early 1940's and set up a fashion photography buisness with her husband Allan Arbus. She took real and raw photos of NYC street life. She focused on people on the edge of society- Freaks, transvestites, dwarfs and giants.


Thursday 26 November 2009

Group Task - Film Titles 25/11/09

We were given a selection of film titles to research and produce a photograph based on this is groups of 3.


The Task
In our group we had to produce a photographthat was influenced by one of the following film titles:
  • Breakfast at Tiffany's
  • The Fountain
  • Into the Wild
  • Dead Man's Shoes
  • Dog Day Afternoon
  • A Clockwork Orange
  • Sunset Boulevard
  • Three Colours Red
  • Stand by Me
  • The Thin Red Line
  • Rear Window

We chose "Into the Wild"
We wanted to depict a person being free in a large open space so we went on the search for a field... we came across playing fields but decided it would have to look over grown and found the perfect one. After taking lots of shots one of our group members (Matt) was walking up the hill and we saw how the overcast sun was shining towards him causing a silhouette. this was our picture!

F 22
1/250 Shutter Speed
ISO 400

Weekly Picture Project

Every Tutorial session we are given a word or phrase as a guide to what sort of photograph we should create. I try not to go for the obvious solution and be as creative as i can!

1. Time
I decided to depict time by leaving a banana and apple to decay over a period of time and used low key lighting which I found was very sucessful. Due to lack of time(ironic) I had to edit more decay so if I was to do this idea again I'd leave it for at least a week!

2. English Breakfast
As i was eating my Shreddies at breakfast time I noticed that the box was the colours of the Union Jack so I decided to take it a step further and paint the individual Shreddies. I used a shallow depth of field at F 5.6.

Tuesday 24 November 2009

Lightroom

As part of the "Systems And Processes" brief we are asked to use Adobe Lightroom and demonstrate knowledge of the options and effects we can create.
We can import photographs using the "Import" button as pictures below, or File>Import


You can rename photographs by choosing Library>Rename photo

We are asked to use the White Balance slider to create a cool, warm and grey balanced version on a photograph


Useful tips
If you are importing to Photoshop do not use output sharpening
Archive purposes - 15 x 10" 300 DPI , 6 x 9" 240 DPI
Shortcuts:
L - See image on dim background
TAB - disable toolbars
Z - Zoom
G - Multiple view


Saturday 14 November 2009

21/10/09 - Available light

We were sent out on a task to take photos of each other in groups of three and see how different light sources have different effects on the photograph. I used both the studio and just about any light source we could find.


Fluorescent light
Shutter speed- 1/25 s
F 4.5
ISO - 200


Fluorescent light
Shutter speed- 1/25 s
F 4.5
ISO - 200


Tungsten light
Shutter speed- 1/25 s
F 5.6
ISO - 100


Fluorescent light (in lift)
Shutter speed- 1/25 s
F 4.5
ISO - 400


Window light
Shutter speed- 1/25 s
F 4.5
ISO - 400


Fluorescent light (vending machine)
Shutter speed- 1/25 s
F 5.6
ISO - 200


Fluorescent light
Shutter speed- 1/25 s
F 4.5
ISO - 100